
Minecraft’s Java Edition, for all of its features and wide range of compatibility, is often a buggy mess on Windows 10. And while the glitches with the game itself are usually minor and easily fixed, launcher errors are more problematic.
Any errors with Minecraft’s Launcher prevent the game from even starting up correctly. Many users report seeing a black screen that opens when running the application. And allocating more RAM to Minecraft does nothing for this problem.

Frustrating as the issue is, there are a number of possible solutions. Here are all the best ways to fix the Minecraft black screen issue and get Mojang’s popular game to launch on your PC again.
Fix 1: Update Your Graphics Drivers
The most probable culprit of the black screen issue is your display drivers. People often forget to reinstall video card drivers after a fresh install of Windows, leading to a subpar performance on the default Microsoft drivers. Taking a moment to update drivers can often solve these issues.
Many online forums recommend simply using the Device Manager to uninstall the device driver, but this approach runs into the same problem. Instead of relying on Microsoft to automatically install drivers for your video card, you should head to the manufacturer’s website and download the correct drivers yourself.
- To install the latest drivers of your computer’s graphics card, head to the manufacturer’s website. All leading laptop and PC manufacturers offer links to updated firmware and drivers for their products.

- You will usually have to enter the model number of your device to find relevant the driver download page.

- Scroll down this list until you locate the VGA or graphics card drivers and download the package.
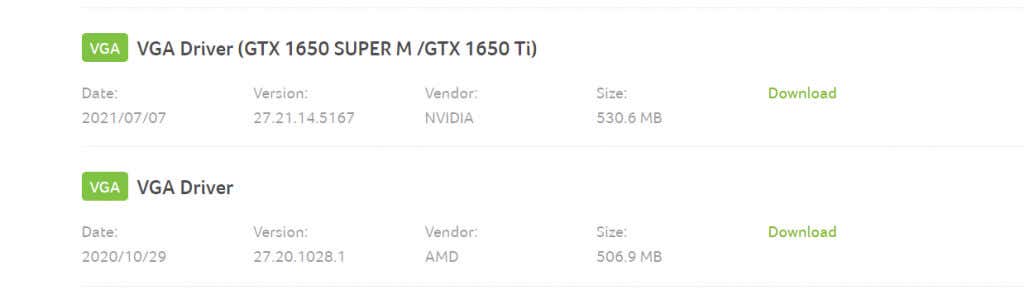
- The installer itself belongs to the GPU manufacturer, such as Nvidia or AMD.

- Running the setup automatically checks your computer for compatibility, and offers the option to update the drivers without removing existing settings.

- Restart your PC once the installation is complete for the new changes to take effect.

Fix 2: Run in Compatibility Mode
If you are playing with an older edition of Minecraft, it is possible that your system is just too advanced for the launcher to function properly. Newer versions of Windows have made plenty of changes to the underlying structure of the operating system, creating weird glitches for older software.
Thankfully, Windows provides a Compatibility Mode to run these older programs. As the name suggests, compatibility mode runs the application in a simulated environment of an older version of Windows, allowing outdated apps to run properly.
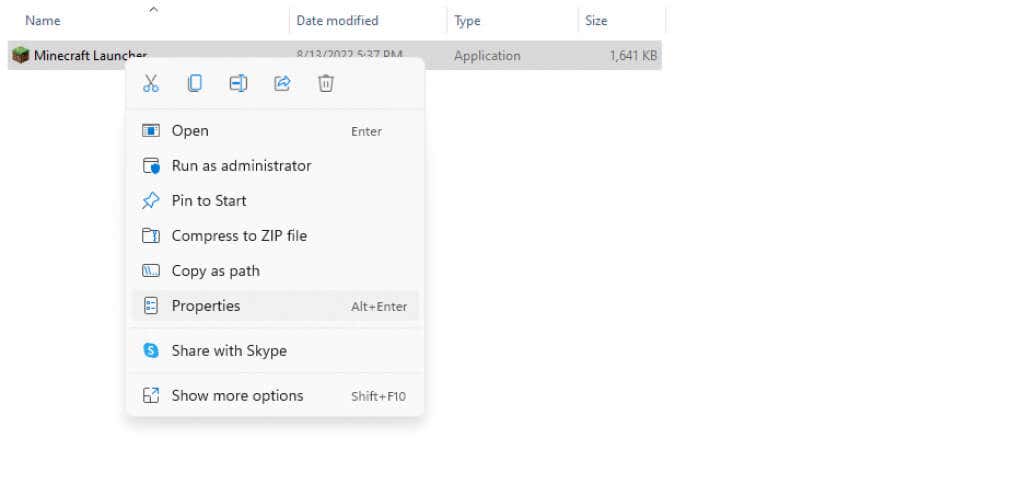
- To launch Minecraft in compatibility mode, right-click on the .exe file and select Properties from the drop-down menu.
- In the window that opens, switch to the compatibility tab.

- Now you can enable compatibility mode by toggling the checkbox and selecting a version of Windows to simulate. Windows 8 is usually the right choice for running Minecraft smoothly, though you can try an older version if that doesn’t seem to work.

- Select OK to close the window and apply the changes.
The compatibility settings will be applied the next time you run Minecraft.
Fix 3: Check Your Antivirus Settings
While uncommon, it’s possible that your third-party antivirus application is interfering with the Minecraft game launcher. Antivirus software is notorious for classifying video games as malware, preventing the game from launching.
You can usually fix this by adding Minecraft as an exception to the antivirus or temporarily disabling the antivirus altogether. The steps will differ slightly depending on the brand of antivirus you are using, but all apps have an option to add certain files as exceptions.
Many security applications – like the Windows Defender – give you the option to deactivate real-time protection, which allows all apps to function without restrictions for a short while. You can also try this method to check if Minecraft works with the interference of the antivirus, and only add it as a permanent exception if it works.
Fix 4: Reinstall Minecraft
Reinstalling an app that is acting up is a tried and tested method of solving most errors. This is because such issues usually stem from corrupted or missing game files, and can be easily resolved when the application is installed again.
The problem with Minecraft Java is that it isn’t like most applications. Trying to uninstall Minecraft’s Java version from Add or Remove Programs only removes the launcher, leaving the game files intact. To completely remove Minecraft from your computer, you need to locate the Minecraft folder and delete it.
You may want to backup your save files if you wish to keep your progress, however. After that, just install Minecraft again and then copy over the save files to the game directory. This will solve any problems stemming from corrupted game files.
- If you know how to view hidden files and folders on Windows, you can find the Minecraft folder in AppData in your user directory. The path is “C:\Users\lloyd\AppData\Roaming\.minecraft”

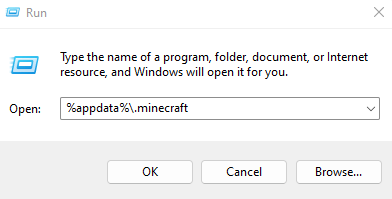
- Alternatively, you can use the Run utility to open the folder directly. Just search for Run in the Start Menu and then enter %appdata%\.minecraft to open the correct directory.
- Now copy the saves folder to another location on your computer to backup your save data and then delete the Minecraft folder. This will remove the game from your computer.

Fix 5: Disable Advanced Display Features
Minecraft is an old game. This means that it can run without problems on basic PCs without powerful graphic cards. On the flip side, this also means that it runs into issues on PCs that do have those powerful graphical capabilities.
Advanced display features like Stereoscopic 3D and SLI mode can mess up with the simpler rendering pipeline of Minecraft, preventing it from even launching. Disabling these features can allow older games like Minecraft to run properly.
Depending on your PC and the GPU in use the steps to do so will differ slightly, but here is how to do it for Nvidia Graphic Cards.
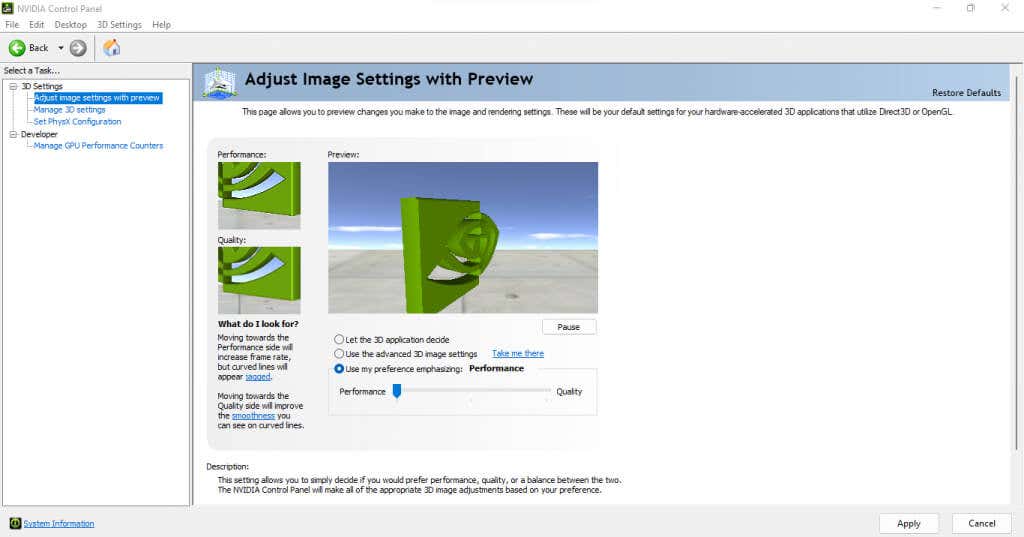
- First, open the Nvidia Control Panel. For AMD video cards, this is called the Catalyst Control Center, and Intel’s integrated graphics has the Intel Graphics Control Panel. You can find these applications by searching in the Start Menu or by right-clicking on its icon in the system tray on the taskbar.

- Now, you can either manage the 3D settings individually or use the slider to make an overall change. It is much easier to just drag the slider toward Performance, as that automatically disables all advanced 3D features. Use the Apply button to save the changes.
This will remove any errors due to your computer’s 3D settings, and let Minecraft launch normally.
Fix 6: Use TLauncher
The official Minecraft launcher is well-known for its frequent crashes and bugs. Many modern computers have trouble even running the game despite trying all tips and tricks. This is why many users rely on third-party launchers instead,
These third-party launchers are far more robust and can run Minecraft without any issues on any PC that supports it. Which, considering the age of the game, is practically all of them.
TLauncher is the most popular of these third-party launchers and works beautifully on all Windows, Mac, as well as Linux. Do note that the use of TLauncher is somewhat controversial in the community due to its ability to be used with pirated copies as well. We advise only using the launcher with a premium Minecraft account for the full experience.
- To play Minecraft with the TLauncher, download the app from its official website and install it.

- Upon running it for the first time, you will be prompted to choose a version of Minecraft to download. Yes, that’s right – TLauncher will download the game files on its own, so you don’t need to have Minecraft already installed on your PC.

- Once you make your decision, select the Install button. TLauncher will now download and install Minecraft on your computer.

- After the installation is complete, you can add your Minecraft account and start playing.

- TLauncher will now exit, and Minecraft should launch without any issues.
What is the Best Way to Fix Minecraft Launcher Black Screen Issue
When Minecraft fails to launch on your computer, there are two possible reasons for this problem. Either the issue lies with your PC, or there is something wrong with the game itself.
Updating your graphic drivers, using compatibility mode, and temporarily disabling your antivirus resolves the most common causes of the issue. If turning off the advanced graphics settings of your GPU doesn’t fix the Minecraft black screen problem, then you need to look at fixing the game rather than your PC.
The best way of doing this is by reinstalling the game completely, or better yet, using an alternative launcher. TLauncher is a great option to play Minecraft on modern computers, with an updated interface and bug-free experience. Using TLauncher bypasses any issues with Minecraft or its launcher, and lets you play the latest version of the game smoothly on all PC platforms.


